
Introduction
This is an immersion draper without cleaning. I had never used one before, so I did what anyone who likes coffee would do. I went out and bought one. I bought one. I tested it. I played with it. I have tried different recipes. And I’ve come to find out that it’s really smart. I also realized that our next coffee brewer battle, our next coffee brewer showdown, should be a clever Draper vs. V60.
The Contenders
They are two dripper or two coffee brewer systems that look very similar. They are both V-shaped. They are both 60 degrees in size. They both have short handles. They look like the same thing, but they are not. They are completely different. So, I am going to explain both of them in today’s episode. I’m going to go to you and I’m going to have a coffee with both of them and give you my thoughts on it. And we’re going to start with the V60. So we’ll put that aside.
V60 Overview
The V60 is a percolation style coffee brewer which means you pour water on top, the water goes through the coffee grinder, and you get coffee on the bottom. It’s also a very hands-on coffee brewer. This is the type of coffee brewer that I personally prefer because I like its experimental process. I like to try different techniques. I love trying different recipes. And I really love the cup of coffee that comes out of it. And there are a thousand different ways to build a V60. I’m just going to do a kind of basic standard recipe. So let’s get this started.
Preparation
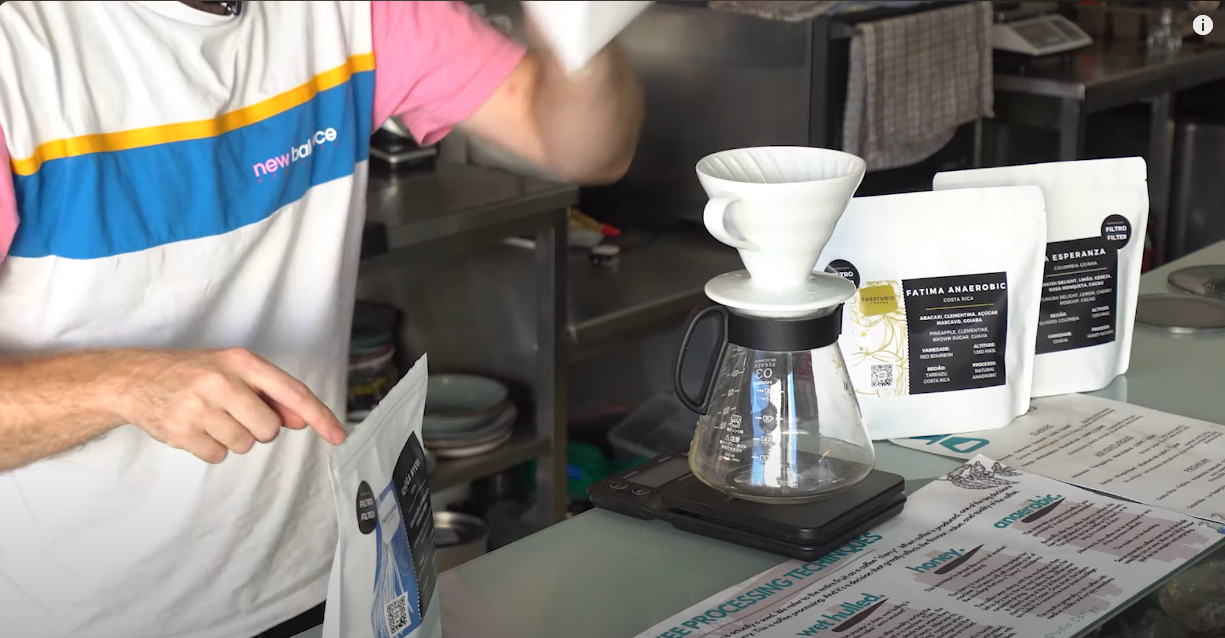
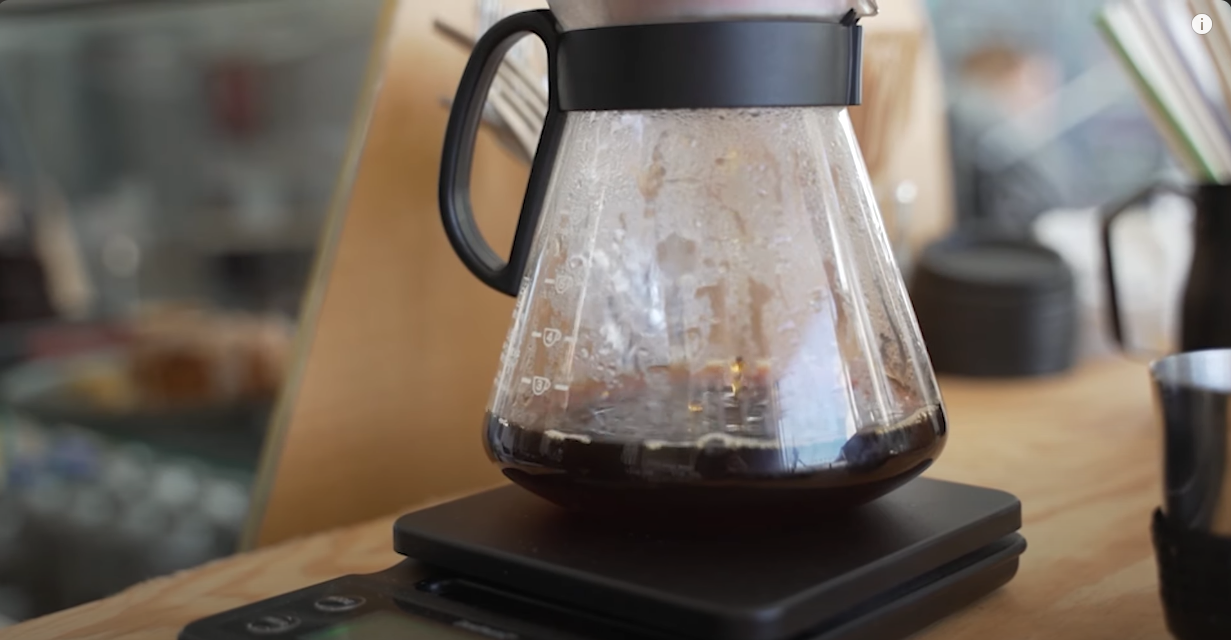
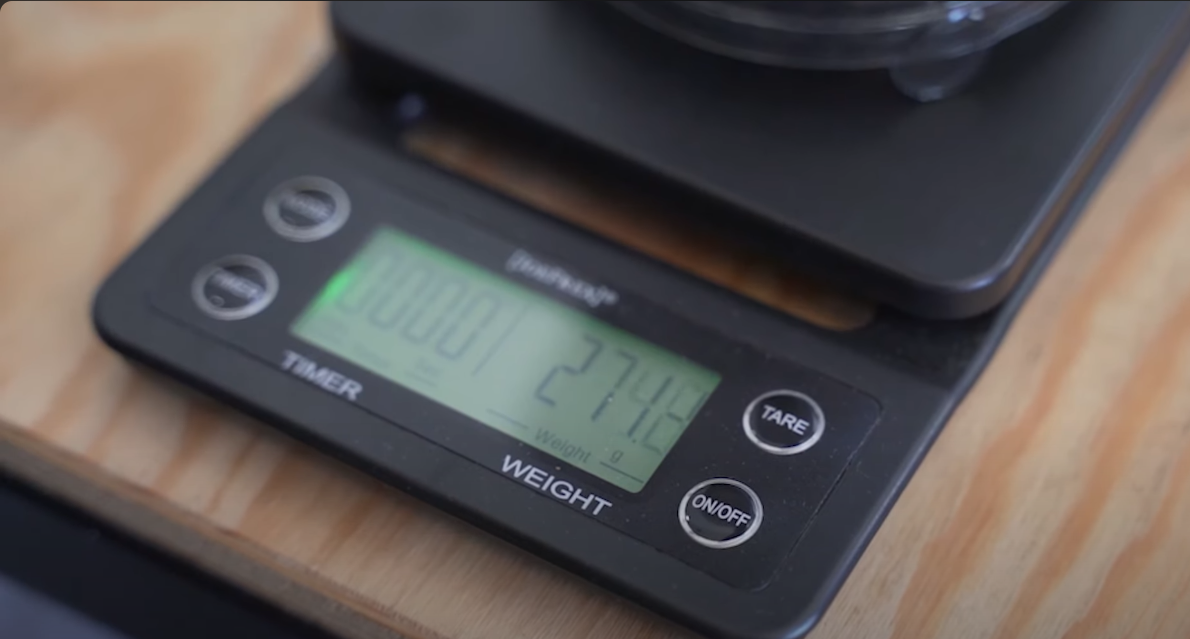
This is the V60 itself. These are the three filters we are going to use. We’re going to insert the filter and then we’re also going to wet the filter. I am using an espresso machine at home. Of course, you can just use an ordinary kettle. And the reason you’re doing that is just to get rid of, you know, any dust or anything that might be on the filter. We will put it back. We are at scale here. The scale also has a timer. Run it.
Recipe and Ingredients
And for both Clever and V60, I’m basically going to use the same recipe. I like my coffee slightly stronger. I think the standard is about 15 grams. I tend to put 20 grams in my coffee. So I’m going to load up my 20g of achuga. This is AB washed bean from Kenya. It’s really quite surprising. This is actually one of the lemongrass tasting notes. Lemongrass, blackberry, dried cranberry, pomegranate. It is truly unique.
Grinding the Coffee
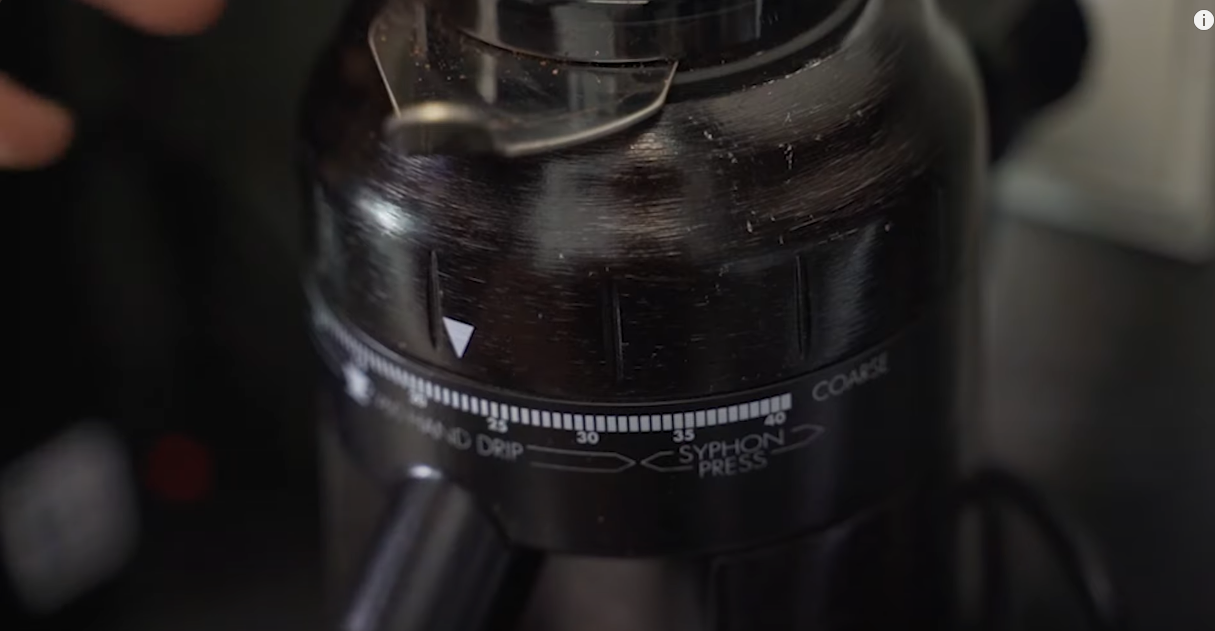
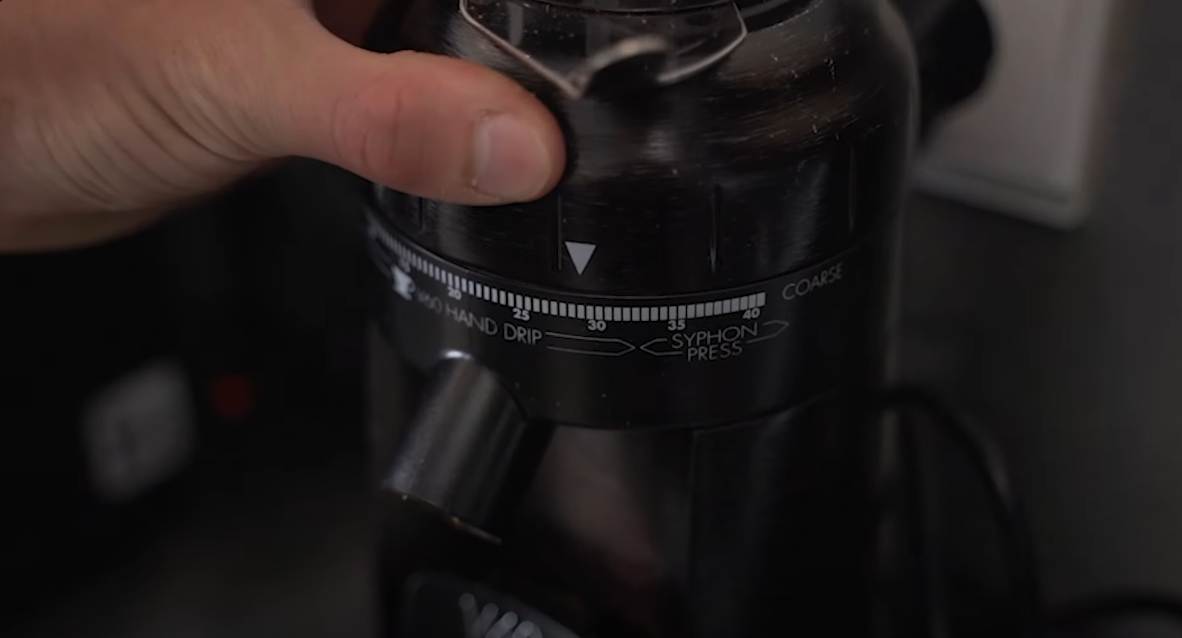
One of the V60’s major challenges is its crushing size. It’s roughly the size of an espresso grind. When you’re dialing in espresso, you might need 100 grams of beans to get it right. The same can happen with the V60, especially if you’re new to coffee. You have to play with it a bit. I do know the grind size for this, and maybe I’ll write a post specifically about grind size in the future, but I won’t do it right now. I’m just going to grind it out and show you how it works. So we’re all standing here, and I’m going to let it in. And I must say that using a filter number three is too much for that amount of coffee. You can also use the number two or the number one, but that’s all we have. So I’m going to settle it there.
Brewing Process
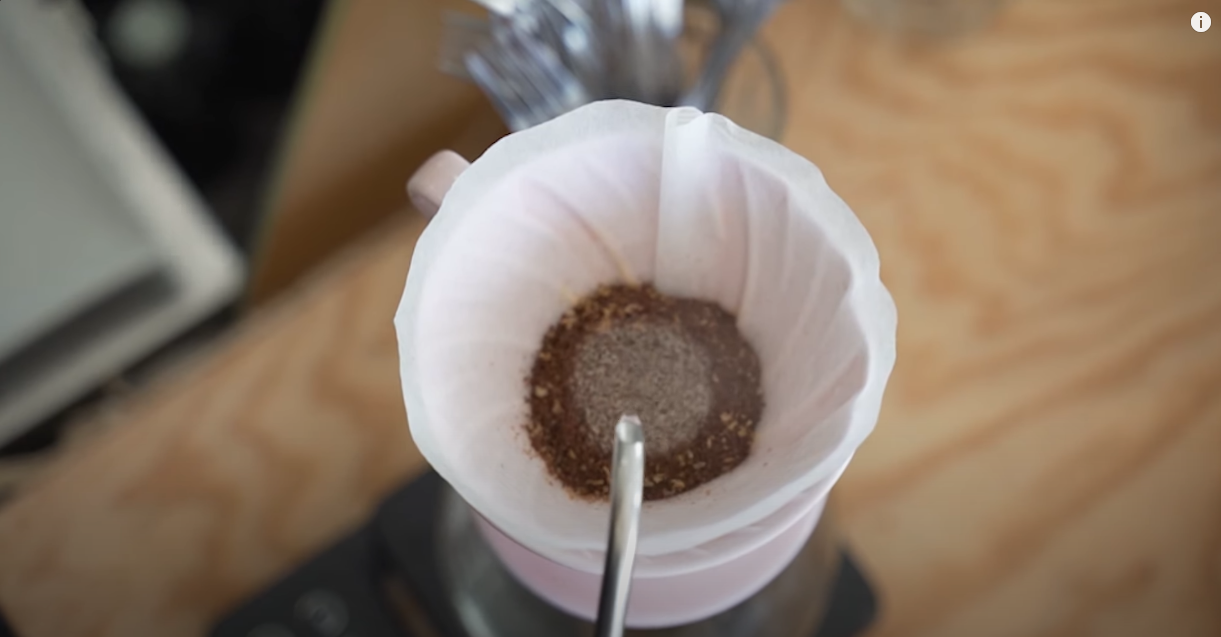
I’m going to make a little finger hole in the middle and I’m going to pour water. Water is another thing people like to argue about when it comes to coffee, but like grind size, every coffee is different. I will use anything from 93 to 96 degrees depending on the coffee. I found for this V60 version with this Achuga 93, 94 is about the sweet spot so here we go. I’m going to finish the scale and I’m going to put the coffee right in the middle and then gradually work outward until I get about 60, 50, 60 grams of water here and all the beans are saturated. . Probably about 50 grams.
Bloom Phase
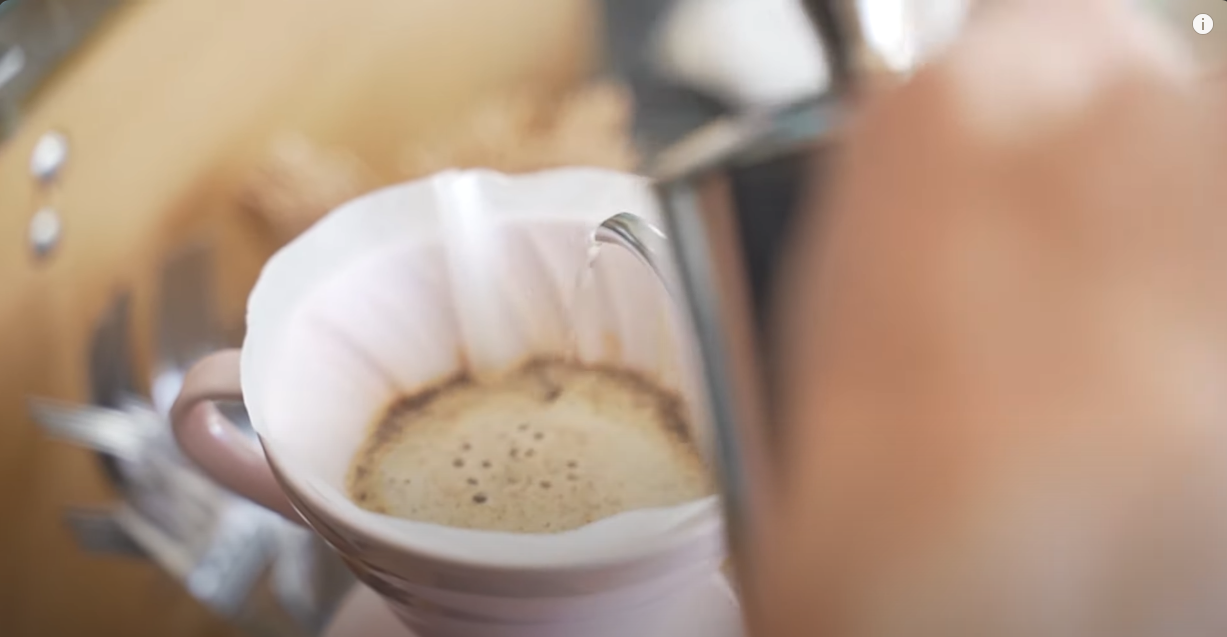
And then I’ll hit the timer. And it has to open. This is where you get a lot of the gases out of the beans and that’s it, it’s a really cool part to watch as you watch the coffee grow and bloom. It’s almost like a volcano is a volcano. Your opening time can vary from 30 seconds to 45 seconds. I do 45 seconds for most coffees. For him. I’m only doing 30 seconds. I have 50 grams and now I am adding another 100 grams to make it 150. Right in the middle of the cup, just swirling really slowly outward and I’m just trying to establish a consistent flow. rate, so I’m actually only doing 50 grams.
Stirring and Settling
Some people will shake the grind now, I just pick things up and spin it a little bit, shake it. What it does is settle the coffee bed. And then now, every 45 seconds or 30 seconds, I just add another 50 grams of coffee. I always put in the middle and then make my way out. The whole process should take about three minutes, three and a half minutes, depending on how you like your coffee. If it runs fast, it can come out really acidic, maybe a little thin and light. If it’s running really slow, it can come out a little bitter. With this Ichuga, we play it a little slower. That’s about four minutes in total. And it helps bring out some of the sweet berries in this coffee.
Adding Water Gradually
So I’m going to add more, up to 200 grams. And I’m just watching the timer. And every 45 seconds, I’m just adding another… uh, 50 grams of water. Another 50 grams. And because you keep adding small amounts of water like that just to keep the flow rate the same. Continue to pass this water through the coffee at the same rate each time. But also to keep agitating the coffee bed so it doesn’t just stick together and stick. The aroma of coffee is amazing.
The Hands-On Appeal of the V60
One of the reasons I like the V60 version is that it’s so hands-on. You are just above the coffee. There is no machine. Nothing is automatic. It’s all you. It’s you and coffee. And it’s a great way to learn about coffee. So if you love that formal coffee experience, this is probably the style of coffee brewer for you. The total weight of our water is 300 grams.
Coffee and Water Ratio
So that was 20 grams of coffee and 300 grams of water. When the coffee is steeped in plenty of water, it should leave us with about 250 grams of water, or a full cup. So we’re just going to wait for it to clear. And again, there are about a thousand different ways to do this process. Some people use a spoon and stir. Some people use a really coarse grind size and they add water slowly for a full three minutes. And some people fall almost entirely into the water and just sit back and let the process happen. There’s no wrong way to do it as long as you end up liking the coffee. that’s it.
Easy Cleanup
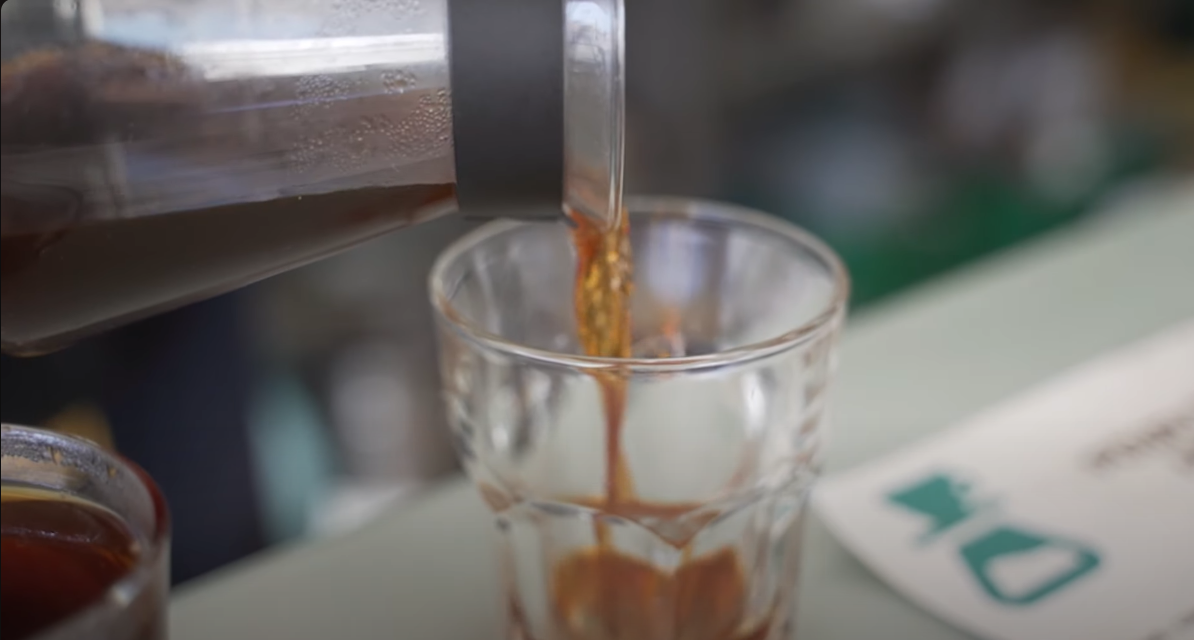
One of the great things about the V60 is cleanliness. You literally just take it off. If there is any water, you can dry it off a bit, or you can take the filter out and put it in a bin, rinse the filter, and you’re done. So it will fit into a comically large coffee jug. Smells incredibly good. Even, I get some honey in the taste, in the smell. Let’s find a small glass. A nice twist. Such aromatic coffee.
Flavor Profile of V60 Coffee
One of the things I love about the flavors of the V60 or the flavor coming from the V60 is that it’s a clean cup of coffee. So if you really appreciate the tasting notes of coffee, you’ll appreciate the V60. The tasting notes really come through. I’m getting a lot of lemongrass in there, a lot of blackcurrant, even some dark chocolate. Really beautiful. I will keep it aside and let it cool. And then we’ll test it against Clever Dripper.
Introducing the Clever Dripper
So the Clever Dripper is here. The Clever Dripper looks like a V60, but it’s not. This is an immersion coffee brewer. The way it works is if you’re laying it flat on a surface like this, there’s a valve at the bottom and the water can’t get out. But if you push that part, it opens the valve and every part of the liquid comes out from the bottom. So let’s make a cup of coffee with her.
Filter Selection and Setup
The way we are going to make this draper work is very similar to the V60 opening. With the Clever Draper system, it recommends using a number four filter, which is larger. I tested both, and I think yes, number four fits the system better, but if you’re making one cup, it’s completely unnecessary. So we’re using a three-number filter here. I also tested flat base filters vs. conical filters, and I found no difference in taste between the two. So we’re going to put a filter. Again, I’m using an espresso machine. You can use just about any kettle. The filter is wet. I’m going to clean it by pushing the base to get all the water out. You can only tip water from the front. In fact, you should probably do both. And you’ve made yourself a filter.
Brewing with the Clever Dripper
It may seem obvious that you shouldn’t drink with a brewer on a cup, but you don’t. That’s not how you do it. You place it on a scale or on its side on the ground. I’m going to grind my coffee. Again, I’m doing 20 grams of my lovely Lechuga because I really want to compare the taste between the V60 and the Clever. I have found, and I experimented for ages at home, I found that the grind size for the cleaver was interestingly almost the same as my grind size. I have water boiling here.
Hands-Off Brewing
And one of the great things about the smart system is that it’s very hands-off. If you’re a busy person and want a great cup of coffee, but don’t want to sit there pouring for three minutes, this is probably a better cup of coffee for you. I am taking fully boiling water and I am going to add 300 grams of water to it. They say that if you have a number four filter, you can add up to 500 grams of water here. But 300 and we are now going to add 20 grams of coffee. And because we’re putting the coffee on the top and not the bottom, when I was testing, the first time I put the coffee first and then in the water, it closed at the bottom, and it was actually dry. was Grind there so that the water passes through. So by doing this, we should properly saturate all the coffee.
Adjusting Water Temperature
I add boiling water, not because I’m going to boil it and drink it even though it’s a light roast, but because when it hits the brewer and when I finish things like that, and coffee. , it will drop to about 96 degrees which is what I want it to be at. So now I’m going to put it in and start the timer and give it a little stir to get it nice and saturated. So just a good gentle stir and I’m just going to leave it for two minutes. Like a French press, that’s all. Just let the coffee sit. I experimented with coffee at home with Cleaver to try to figure out what kind of time I wanted. And I found two minutes to be the perfect sweet spot. I went for two and a half minutes and the coffee tasted a bit bitter. If I went any lower, the coffee was a little weak.
Importance of Grind Size
And I also found that grind size was really, really important. I started fantasizing, thinking that I might have the French… the roughness of the French press, which is really thick. And I was drinking extremely watery, thin coffee. I eventually got finer and finer to the point where I was V60-ish and getting much richer, fuller coffee.

Stirring and Forming the Bed
Okay, so we’re coming up on two minutes. That’s, like I said, my sweet spot. And I’m gonna give it another stir. And the reason I’m giving it another stir now is because a crust forms on the top of coffee. And I want that crust to drop down to the bottom. And I want a bed to form. So I’m going to knock it down. I’m also going to give it a little swish.
The Magic Moment
And then this is where the magic happens. I’ll pick it up and put it there. And I’m going to cleverly, cleverly leave the top of that glass. And coffee comes through. And this whole process of water passing through the coffee should take about a minute. This is because it is not fully immersive. It’s immersion mixed with percussion.
Observation During Brewing
And you may have noticed that when the coffee first came out, it was very light and is getting darker. And that’s because the water at the bottom isn’t getting enough water that’s touching it. This is the flaw in the shape of this coffee dripper. Whereas, according to a French press, the water is absorbing the coffee at the same rate.
Structural Design Flaws
Because of the conical shape, it doesn’t quite work that way. In addition, there is a bit at the bottom that holds water, but there is no coffee in this place. So it started to look very light. You can see it’s done now.
Easy Clean-Up
And again, the beauty of it, like the V60, probably the one thing they have in common is that you can now take it off your cup. You can grind and you can put them in your box. You can wash it and make another cup. So it’s a really clever system. This is an apt name system. I think this is also a tasty system.
Taste Test
Let’s try this coffee. It’s a little hot for my liking so maybe I’ll let it sit for a second. It shouldn’t have been done in glass, but I wanted you to see the color. And again this is a really great cup of coffee. I would say it tastes a bit thinner than the V60. It tastes a little less clean and crisp than the V60.
Comparing Flavor Profiles
I get a lot of it when I do a clever dripper but it tastes a bit more muddy. It’s a really sweet delicious cup of coffee but it’s not that strong and strong if that makes any sense. But yes absolutely beautiful cup of coffee. I like to wait until they cool, like 10 minutes if it stays bright enough. And I want to try both of these coffees cold because I think that’s where you can really appreciate the coffee.
Testing Coffees at Room Temperature
Both coffees have now cooled to almost room temperature. I am going to test them again. But just on the eye test, I can tell that the coffee on the right, which is V60, is a bit darker. And it is likely that it was either better extracted or more extracted. And this one, which is the cleaver, is looking a little lighter, meaning it was probably pulled down a bit.
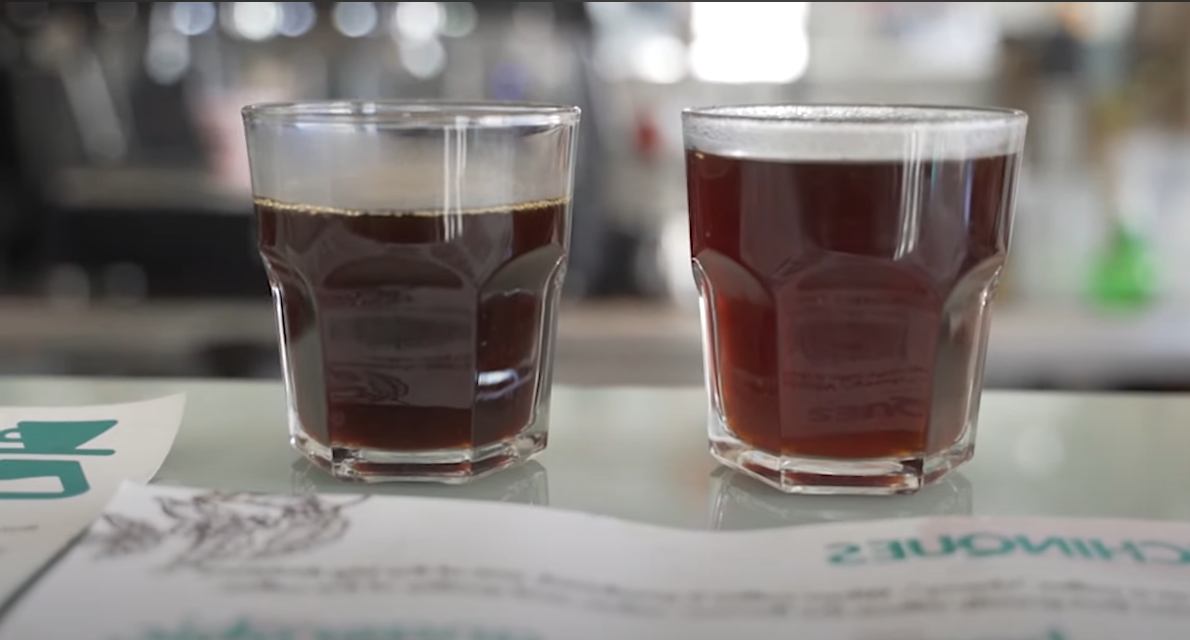
Extraction Levels
You know, underextracted and overextracted doesn’t mean better or worse enough. It just means overextracted or underextracted. So, drink some sparkling water to cleanse the palate. Fun fact, I hate sparkling water. It just tastes like dirty water. Okay fine. The first V60 version is due out.
V60 Coffee Taste
Very good. This is very good. Quite a lot more life than the V60, in my opinion. In my opinion, you get a lot of complexity in the cup. It’s just an absolutely beautiful cup of coffee. So I’m about to rinse that cup of coffee out of my mouth with that horrible sparkling water. After coffee, water is literally the second best drink in the world. Why ruin it with bubbles?
Clever Dripper Coffee Taste
We are now going to try the Clever Dripper. Scoop up. Oh, and it’s really interesting. These are identical coffees. They taste very different. I would say that the left cup of coffee and the right cup of coffee are almost like a direct translation of how they are made. Clever Cup is very sweet and easy and smooth.
Final Thoughts on Both Methods
It doesn’t hit you in the face. It gives you a good enough hug. This is a really easy cup of coffee to drink. And I think it’s very interesting because this cup of coffee is almost for someone who likes the whole process of coffee, including tasting and really trying to find notes and things like that. . While the Clever Dripper is a very easy coffee to make and is probably for the type of person who really loves coffee and likes a really good cup of coffee, the whole ritual of making it sits there. There is no time. This.
Conclusion
It’s a very interesting dynamic. And I would say that none of these cups of coffee is better than the other. They are just extremely different. The V60 kind of wows you and slaps you in the face. Clever gives you a good enough hug. And right now, I think I need a hug. And we’ll see you guys on the next content.


